Friday, August 31, 2012

DIY: "Stain" Glass Block Windows

My master bathroom has a huge glass block window.  While it is pretty, it is kind of...well...boring.  It needed to be made more fabulous.  I was sifting through the million and fifty ideas for tinting mason jars the perfect shade when it hit me like a ton of bricks....I could probably tint the glass block window!  I immediately sorted through page after page trying to decide what recipe I would use.  I initially settled on one that used modge podge, water, and food coloring.....yeah.....WAY too thin for vertical use.  It ended up just all running down the front of the block and not sticking very well.  Back to the drawing board.  Not to be defeated by something that should be so simple, I tried again.  This is what I came up with....

Here's what you need:

White Elmer's School Glue (yeah for real)
Food Coloring (for the color pictured I used 6-7 drops of red to 2 drops of blue)
Paintbrush
Small Bowl
Tape


Directions:

Now that you have what you need, let's get started.
Begin by putting a good healthy squeeze of glue into your small bowl...no measuring required


Now add your food coloring to reach the desired color.  I chose a burgundy color created by adding 6-7 drops of red and 2 drops of blue.
Mix it Well.


It's going to look a little bit light and swirly.  This is because it is mixing with the glue...it will dry your intended color and smooth.

Now we will take our mixture, paintbrush, and tape to the area we will be working in.
Tape off the square of the window you want to paint.


Begin applying the glue mixture in long, even strokes.  You will want to make sure that you do this in a coat thin enough that it won't run....otherwise you will be dripping all over the place.  It will look streaky at first, but the streaks should go almost totally away as it dries.


Once you have finished, let the area dry for quite some time.  DO NOT try to use a hair dryer or any other drying method.  This will create nasty little bubbles all over the finish.


This shows the color difference between applying one coat and applying two coats.  As you see, I got a little heavy handed with my second coat and have some drips.

That is ok, because as long as I haven't broken my own rule and used a hair dryer, I can simply take out the glass cleaner or warm soapy water and take this right off.

I plan to go ahead and paint the rest of the window blocks soon.  I am not doing them all red.  I am going to do some red, some green, some brown, maybe a yellow here or there and a couple left clear.  I'll post another pic when I am finished with the entire window.

Did you try this project?  Post a pic or tell me about it.  Have a different idea on how to do this, please share!  Can't wait to post again soon!


Thursday, August 30, 2012

DIY Laundry Detergent & DIY Stain Remover


Welcome to another Thrifty Thursday.  This week I want to share with you yet another way I keep things thrifty as a stay at home mom.  I make my own laundry detergent and stain remover....what was that....no, I am not clinically insane....I make my own laundry detergent and stain remover. 

At first, I couldn't see where it would possibly be worth the savings to make my own detergent.  Boy was I mistaken.  It is actually quite simple and saves you a ton of money.  I actually made my most recent batch of detergent quite some time ago, so this post is not going to have pictures.  I'll update you with pictures of the process the next time I have to make detergent.

My seven year old and I had a blast doing this project together.  She loved grating the soap.  If you do allow your children to help you, make sure that they do not handle the borax or washing soda and then touch their eyes.

This detergent is typically thinner than average detergent.  It leaves virtually no scent on your clothing.  If you are someone who needs to have the smell associated with clean, you will need to add essential oil or use fabric softener of some sort.

Detergent
Here's what you will need:
6 c. hot water

1 Fels-Naptha or other lightly scented soap bar (Ivory, etc)
1c. Arm & Hammer Super Washing Soda
1/2 c. borax
essential oil (optional and of your choice)
5 gallon bucket
empty, clean laundry detergent container

Note: Arm & Hammer "Super Washing Soda" may be purchased in the cleaning aisle at some stores or purchased online. My local Walmart started carrying it about six months ago. Ace Hardware typically carries it though if you have one nearby. Baking Soda will not work, nor will Arm & Hammer Detergent.  It must be sodium carbonate!!


Now that you have gathered all of your supplies, let's get started!

Directions:
Start by grating your soap. 
Heat your water in a medium to large saucepan, then add the grated soap and stir until soap is completely dissolved.
Run hot tap water to the halfway point of your 5 gallon bucket.
Add soap solution, borax, and washing soda.
Stir until all powder is dissolved.
Fill the remainder of the bucket with more hot tap water.
Let rest overnight.
Stir your detergent.
Fill laundry detergent bottle to the half way point.
Fill remainder of bottle with hot tap water.
If you wish to add some additional scent to your detergent, add a few drops of the essential oil of your choice (example: lavender)

How do I use it?
For a top load machine you will use1/2 c. per load
For a front load machine you will use 1/4 c. per load
Give the bottle a quick shake before using the detergent each time to keep the detergent from gelling together.

So How Much am I Actually Saving?
On average, buying laundry detergent costs around 60 cents per load.  On average, making your own laundry detergent costs around 3.5 cents per load.  Basically, if you do one load of laundry per day, you save around $204 per year.  I know that doesn't sound like a whole lot for the entire year, but every little bit counts.


Stain Remover
Here's what you'll need:
3-5 Tbsp Borax
Hot water
Spray Bottle

Directions:
Put Borax into bottom of spray bottle...exact amount depends on the size of your spray bottle...for the one shown, I used 4 Tbsp.
Fill remainder of bottle with hot water.
Shake to dissolve
Use on stains

Use:
Use as you regularly would a prewash stain aid.
Extra Tips:

Vinegar makes an excellent deodorizer and fabric softener. Throw 1/4 c. into the softener cup of your machine. This also serves to keep your washing machine nice and fresh.
If you really desperately need to have a scented laundry experience, you can always cut up sponges, soak them in diluted fabric softener, and dry them with the clothes as you would dryer sheets.


Did you try this recipe or have a recipe of your own for liquid laundry detergent?  Post pics or comments and let me know about it.

Tuesday, August 28, 2012

Freezer Storage Safety Chart FREE Printable!


Free printable below

Ok, guys.  Welcome to Wildcard Wednesday!  I have had a few questions in my personal circle of friends about what is safe to freeze and for how long.  I decided since I am going to be posting a lot of meals pretty soon which are meant to be frozen I should also post a freezer storage safety chart. 

For the free printable version of this chart, please click here!  Print and enjoy!

Can you think of something I missed?  Did this help you?  Let me know about it in the comments below.

Pin It

DIY Finger Paints & A Project

Welcome to the very first Toddler Tuesday!  I've got something absolutely great for you guys today.  We are going to start with a finger paint recipe and finish with a project (and have lots of adorable baby pictures along the way).

I have been wanting to let my babies finger paint, but didn't want to pay the high price or expose them to whatever is in finger paint.  I know that Crayola is non-toxic, but my baby girl eats absolutely EVERYTHING!  I did some online research and found a few different recipes for finger paints.  The one I am going to share today is the easiest one with the best results.  My favorite part is that it doesn't matter if Leah eats paint!  Everything in the paint is also something I use frequently for cooking!

Here's what you will need:
3 Tbsp. Sugar
1/2 tsp. Salt
1/2 c. Corn Starch
2 c. Water
Small containers with lids
Food coloring


For project:
Paper and/or canvas
Tape and/or stickers

So now that you have gathered all of your supplies, let's get started.


Start by putting the 2 c. water into a small/medium saucepan.  Mix in the sugar, salt, and corn starch.  Heat over medium, stirring constantly until the mixture thickens. 


Note: One minute it will look like milk and then BOOM! insta-magically it will thicken....well, almost that quick anyway.  Cool the mixture and spoon into small containers.


Add food coloring to achieve desired colors.  I found that yellow and green only required 3-4 drops while blue and red required 6-8 drops to fully take color.  I threw in pink for my girls as well, but this was a neon gel color, so it really doesn't get measured in drops...I guess a nice firm squirt?  At any rate, mix and match the colors until you get what you want out of them.  Put the lids on to use later or use immediately...up to you.  This makes a pretty thick paint.  If you have too much cornstarch it will become chunky.  If you like a thinner paint, feel free to add more water when mixing.


Disclaimer: While the paint is safe to consume in small amounts (ex. in the case of baby hands in the mouth), this paint is not intended for consumption in larger volumes or as snack food.  --Just saying.


Laney says it doesn't taste good

Now for the project!  Oh yeah, the baby pictures are coming!

First, you will want to take tape or stickers and creat a design of your choice on your paper or canvas.  For my little ones, I did a number 1 and a number 2 on scrapbook paper since their birthdays are coming up soon.  Laney, who is 7, needed a little more of a challenge.  I used the cricut to cut out a Bible verse from vinyl, then placed the stickers on a canvas.


Don't try exceedingly hard to get these straight


Then just let them have at it!  Let them go wild and paint to their little hearts' content.  I tried to gently encourage some handprints and things of that nature, but I don't know how many we actuall ended up with.  Oh well.


Somehow I knew she was going to eat it....Sigh....


Once they have finished their masterpieces (or have gotten enough of playing in the paints), find a place to let the pictures dry where they won't be disturbed.  If you used the stickers or vinyl letters, you want to watch how long you let them paint.  If the letters stay wet longer than 20-30 minutes, they start falling off.....I am going to have to use some white paint to rescue an "s".


see the "s" I have to rescue?

Once the paintings have dried thoroughly (they will be pretty soaked), you just need to peel off the stickers or tape to reveal the letter, number, or verse underneath.  I used white paper and white canvas.  If you wanted to use a colored paper to reveal a colored background, you could certainly do that as well.  If you use a longer verse or smaller script like we did for Laney's, I recommend avoiding yellow...the letter edges don't show up as well on yellow.

Thank you so much for joining me for Toddler Tuesday.  I hope you enjoyed the project and exorbitant amount of baby/kid pictures.  Did you and your kids do this project?  If so, post pics or tell me about it!  If you have questions, ask away.

We are all tuckered out from our big project!  Let's see mommy try to get our pj's on now...


Pin It


Monday, August 27, 2012

My Basic Menu Planning Tools

Menu-Planning Mondays couldn't possibly kick off without me sharing with you my most basic menu planning tools.  Obviously my growing cookbook collection and endless internet resources are very helpful, but today I am going to share with you the printables that I have made or gotten from others that make my menu planning easier.  I am kind of transitioning from once a week shopping and planning to once a month shopping and planning, so I will show you both sides of my transition.

Weekly Planning Tool
When I was doing once a week planning and shopping, this was my absolute favorite tool.  In fact, if I had not made the decision to start shopping monthly I would still be using it now.  I love the reference to Proverbs 31 in the center of the page.  I am soon going to adapt the top part to be my weekly plan cards which I will tell you about later in the post.  I got this awesome menu planner from TimeWarpWife.com. She has lots of great tools in addition to this one too.  Basically you just fill in the top part with what dishes you plan to serve, complete with sides.  Then you fill in the bottom area with the shopping list that you will use for that week's shopping trip.  I keep these in my Menu section of my Household Management binder which is currently under construction for renovations.  Once again...I will share that at a later date.

Monthly Planning Tools

Scroll down for free printable


Now that I am shopping/planning once a month I use these really high tech things called index cards to write down the menu for each week.  Then I use this sheet for my grocery list.  I created this one myself with inspiration from another blogger out there somewhere.  It has headers for each section of the grocery store.  I don't know about you, but I desperately needed these headers to keep me from aimlessly wandering around the aisles forgetting things. 

For the free printable of this grocery list, click here.

If you share this, please direct people here to print.

Once I have planned and purchased all items needed for the month, I label and organize the items like this.


Each week has its little area in my kitchen pantry.  In the area I also store the menu card for that week and any corresponding recipe cards so that everything I need is right there when I get ready to start dinner.  Anything that is pre-made and stored in the freezer has an "(F)" next to it on the menu card to remind me to thaw the item out.  You probably noticed that my weekly areas are getting a little bit bare.  That is because we are in the last week of a round of monthly shopping.

Next week's edition of Menu-Plan Mondays will contain my monthly menu for the month along with the shopping list I used and the way that I prepped and stored everything for the month (complete with pictures), so make sure you are here for that.  Sneak Preview, you say? Next month I will use my crockpot a TON!  If you are looking for crockpot recipes, you aren't going to want to miss it.

Pin It


Saturday, August 25, 2012

DIY Anglican/Protestant Prayer Beads

Welcome to a Special Request Saturday.  These posts will not occur every week, but they will occur on weeks that I have special requests that I can't wait to share. I had a suggestion from a friend for this post, and I didn't want to make it wait until Wednesday or Friday because I thought it was a great idea.  I am familiar to some extent with the Catholic Rosary, but had never been introduced to the Protestant Rosary or Beads.  For those, like me, who had never heard of Protestant Prayer Beads until this project, I am going to give some background as well as how to use them in addition to the DIY.  Who says you can't craft and learn at the same time?

What are Protestant Prayer Beads?

The Protestant "rosary" was created in the 1980s by a group of American Episcopalians seeking a a more contemplative, more meditative method of prayer. They are a blend of the Orthodox Jewish Prayer Rope and the Roman Catholic Rosary.  The Protestant rosary begins with a cross, followed by an invitatory bead, with which we invite the presence of God. The chain then creates a circle consisting of four cruciform beads representing each branch of the cross, 28 weeks beads in four groups of seven literally representing the seven days of the week. In Judeo-Christianity, the number 7 is representative of spiritual perfection. Jesus is honored in the amount of beads and the cross. One bead for each year of his earthly life totaling 33. Each bead is assigned its own prayer. They are connected by uncounted spacer beads allowing hands to flow from bead to bead while praying to keep the mind from wandering.

Making Your Prayer Beads, or Rosary

Here's what you'll need:

Beading wire or thread 
Size 10 beading needle if using thread
Clothespin or small clamp if using thread
Scissors or shears
1 cross or other terminal charm
1 invitatory bead – Large, recommended size 10-12 mm. or larger
4 cruciform beads – Medium, recommended size 8–10 mm.
28 weeks beads - Small, recommended size 6–8 mm.
Spacer beads - seed beads in size 6, 8 or 11


I have made two sets of prayer beads for this project and will show pictures of either or both throughout this post.

Make sure that when you choose a beading wire, you choose a very thin, flexible wire.  The bead sizes in the supply list are just suggestions.  As long as you end up with 28 small, 4 medium, and one large bead along with the other materials, you will be just fine. I chose to use beading wire, so my directions will be for that.  If you choose beading thread, please adapt to your needs.

So now that we have all of our materials gathered, let's get started.

Begin by cutting about a 3.5 to 4 foot section of wire.  Tie a loose knot or place a clothespin about 4 inches from the end of the wire.  String your cross or terminal charm followed by 5 seed beads.  Then string your invitatory bead followed by 5 seed beads and your first cruciform bead.


Now you are ready to begin stringing the path of the circle of prayer beads.  Begin with three seed beads, then add one weeks bead.  Continue in this fashion until there are seven weeks beads, then end with three more seed beads.  Add your second cruciform bead.  You have now completed the first section of the round.  Repeat the pattern used in this step until all weeks and cruciform beads have been strung, ending with three seed beads.


To close the circle, and finish the rosary, you will need to string the wire back down through the first cruciform bead, the spacer beads, the invitatory bead, and the remaining seed beads to return to the cross or terminal charm.

Untie your beginning knot and hold both strands of wire together.  Pull the wire to tighten the beads up, then tie a snug knot around the eye of the cross or terminal charm, making sure the knot is pulled all the way tight as close to the seed beads as possible with no slack in the wire.  Trim the wire ends to about 3/4 of an inch.  Thread the loose ends back up through the spacer beads to hold in place.  If you choose, you can also add some glue to the knot to make it more secure.


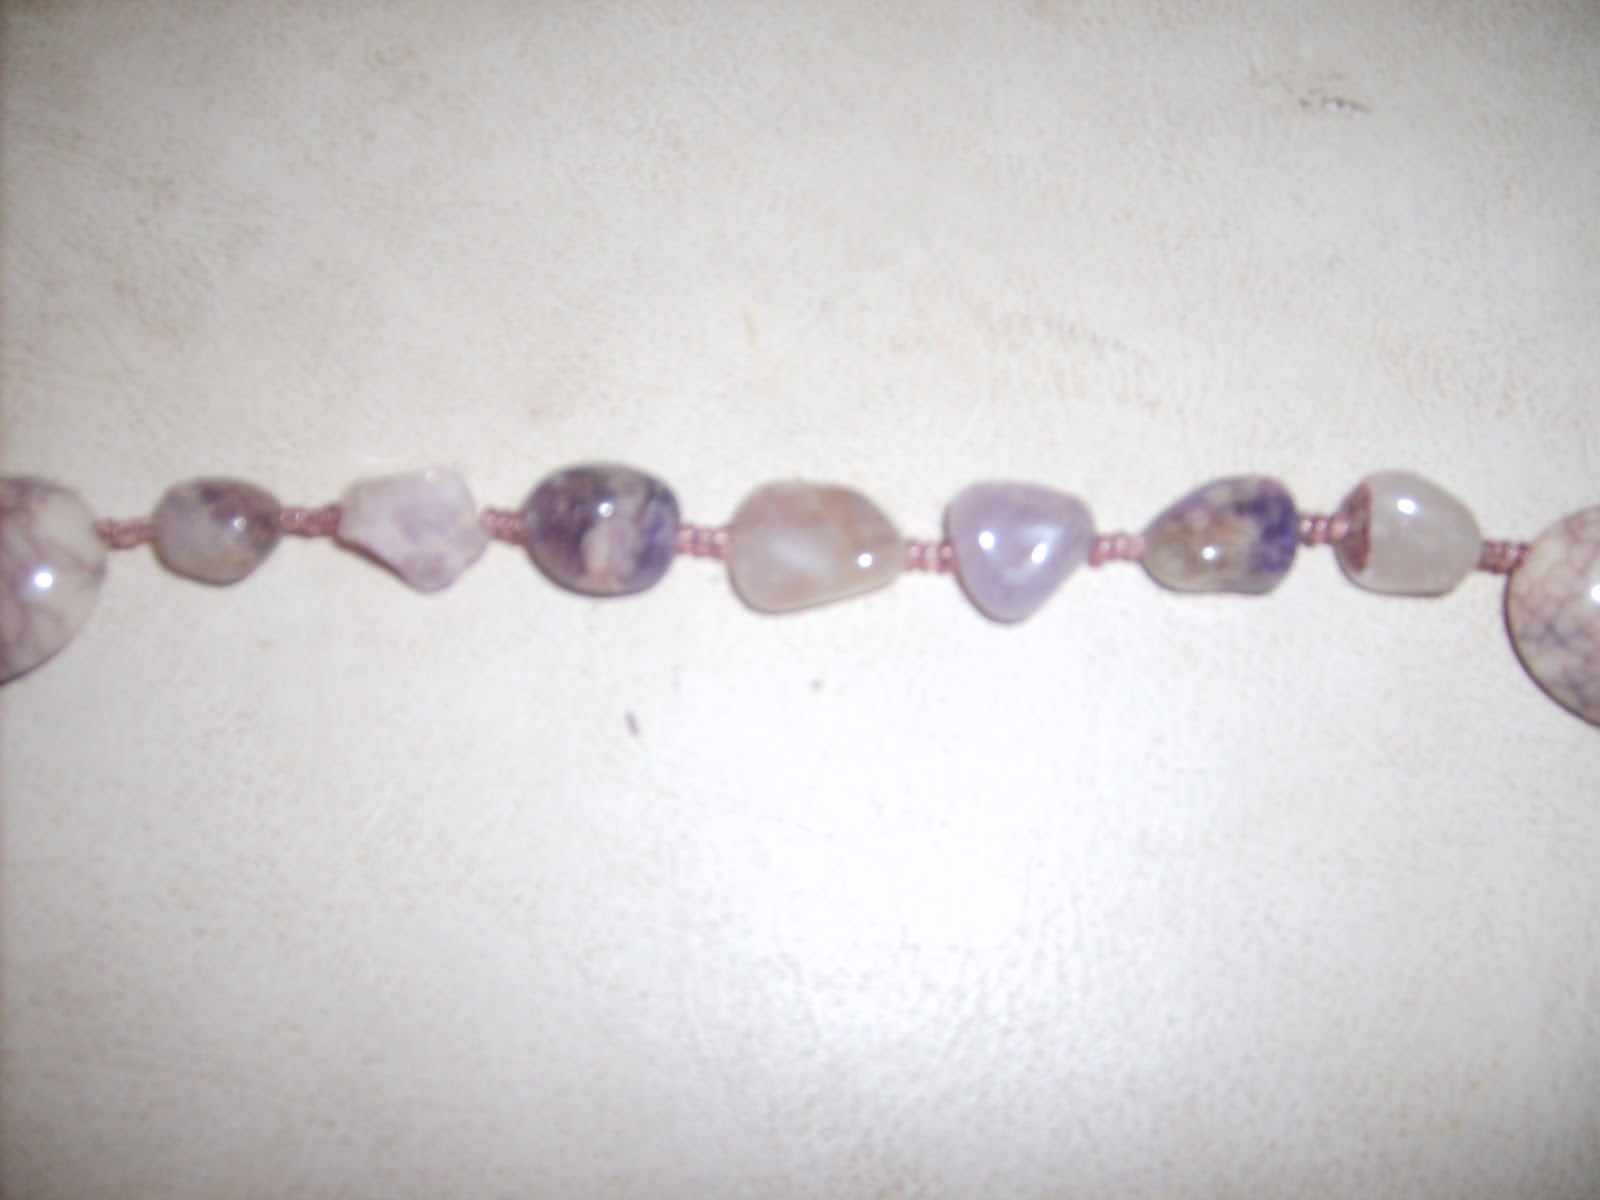
This rosary style is more traditional.  I chose a cross pendant in silver with clear crystal accent stones.  I chose a smoky grey crystal invitatory bead and smooth, natural stones with a lavendar hue for my weeks and Cruciform beads.  For spacers I used darker lavendar seed beads in size 11.


This rosary is a more non-traditional style.  I chose these beads to demonstrate that the style is completely personal preference.  For this rosary, the cross pendant is in an antique brass finish with yellow and orange crystals and a apricot tone pearl.  I choose an amber crystal invitatory bead.  My cruciform beads were large, apricot tone pearls.  Instead of fixing the weeks beads between spacers for this rosary, I chose to use a different technique.  I used size 6, antique brass finish seed beads to make an length that would allow the beads to slide.  For my weeks beads I used Pandora style charm beads in a range of amber tones.  The Pandora style beads are large enough in the center to slide freely over the seed beads and travel the full length between cruciforms.


 No matter what beads you choose for your Prayer Beads, the most important thing is that you end up with the beads strung into this format.


How Do I Pray With Protestant Prayer Beads?

Find a quiet spot and allow your body and mind to become restful and still. After a time of silence, begin praying the prayer beads at an unhurried, intentional pace. When you are ready to begin, hold the Cross and say the prayer you have assigned to it, then move to the Invitatory Bead and the prayer you have assigned to it. Enter the circle with the first Cruciform Bead, then continue to your right, praying with every weeks and cruciform bead along the way.  It is suggested that you complete the circle of the beads three times to signify the Trinity. The repetition is said to enable your mind to rest and your heart to become quiet and still. Praying through the entire circle three times with the cross at the beginning or end results in one hundred prayers, which is the same as the Orthodox Rosary.  After you have prayed the circle three times through, you can choose to close your prayers with The Lord's Prayer at the Invitatory bead and "I bless the Lord" or "Thanks be to God" at the cross. Once you have finished praying, a quiet time should be allowed.

Selecting Prayers

You will need to select the prayers that you want to assign to each bead and the cross and practice them until you easily remember which prayer belongs to which bead.  You can of course create and assign your own prayers or mix and match existing prayers.

Several prayers include Bless The Lord, Trisagion and Jesus Prayer, Agnus Dei, Julian of Norwich, A Celtic Prayer, Come Lord Jesus, Saint Patrick's Breastplate, and an Evening Prayer.  The scripts to all of these can be found here.
 
Shawn Foles, the friend who inspired this post, has been kind enough to share with us the prayer that he uses.  Shawn says,
"Prayer beads came to prominent use in the United States in the 1980s. They came into use by the Episcopalians in the United States and have since spread to several groups including Lutheran and United Methodists. For me as a United Methodist, I incorporate them into my prayer life in times when I struggle to focus on prayer along with several other prayer aides like a labyrinth. One of the easiest and most centering prayers involves ACTS prayer. ACTS prayer is a great tool to use to teach children how to pray, and also to focus when you find prayer difficult. Below is an outline of ACTS prayer and using prayer beads to accomplish it.

The pattern for the prayer bead is to start with the large bead behind the cross called the invocation bead. After that you proceed to the first large bead (cruciform). Once finished with the cruciform you proceed through the 7 week beads until you reach the next cruciform bead. Continue this pattern until you have gone in 3 complete circles around the prayer bead. Once you have finished 3 complete circles including the invocation bead each time, you have completed 99 prayers. Praying over the cross makes 100. You then relax and listen for the spirit to speak.

A-Acknowledgement
C-Confession
T-Thanksgiving
S-Supplication (Prayers for need) 
ACTS Prayer

1st time praying though beads

Invocation Bead:
May the words of my mouth and the meditation of my heart be pleasing in your sight, O LORD, my Rock and my Redeemer.Psalm 19:14

Cruciform Bead:
Lord, Hear my prayers and answer them swiftly so that I may be more like you
Each section of the prayer beads represents the same section of your life. They are:
1st set of week beads: Family
2nd set of week beads: Friends
3rd set of week beads: The World
4th set of week beads: Yourself

The first time around pray prayers of Confession. Areas in which you have not served God in the areas listed

The second time through pray prayers of Thanksgiving. Things within each group you are thankful for. (I.E. Great Children or spouses during the 1st set, supportive friends during the 2nd set, etc)

The third time through pray prayers of supplication. This is the time for you to lift up prayers to God for your needs. (I.E. prayers of help for a family member or friend. Prayers of courage for yourself in the 4th section of bead, or prayers for peace in the world during the 3rd section of beads)

Cross prayer (Final Prayer):
Oh gracious God. You hear my prayers of confession, thanksgiving, and need. I confess that I haven't followed you with my whole heart, but I seek to be more like you each day. Hear my prayers and accept them as pleasing in your sight as I sit and allow your spirit to wash over me. Amen"

 
I am so glad you joined me for this Special Request Saturday.  If you make your own set of prayer beads or create your own prayer, please tell me about it or show me a picture in the comments below.  If you have any more specific questions, ask away.  I will do my best to answer or direct you to someone who can.  See y'all next time!

Pin It