Showing posts with label Toddler Tuesdays. Show all posts

Tuesday, October 1, 2013

Quick and Easy to Sew Tie Closure Bib Tutorial.

Sewing thick, absorbent bibs for your baby is actually a lot simpler than you may think.  I have made bibs several different ways, but this is the quick and easy way.
 
 
Here's what you'll need:
Fusible fleece
Fabric of your choice for the front
Fabric of your choice for the back
Double Fold Bias Tape in coordinating color (about a 24 inch length)
 
And of course a sewing machine, thread, pins, an iron...basic sewing tools.
 
A note on the fabric, the size you need will vary based on what size bib you use as a template, but a 10x10 square should pretty much cover all of your needs.
 
 
Here's what you do:
 
Pick out a bib that you already have in the house (or just draw a circle and cut a notch out) and trace it onto the rough side of your fusible fleece.  Then cut it out.
 
 
Set your iron to a setting that does not steam.  This is important for the fusible fleece sticking correctly.
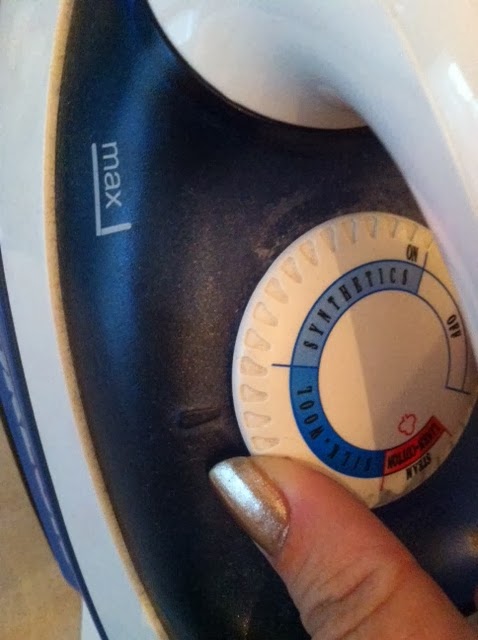
 
Lay your fleece cutout rough side up, line your front of the bib fabric up on top of it right side up and iron according to fleece directions. 

 
This is what the back looks like.  Basically you just fused the bib to the wrong side of your fabric so that it will act as a lining for your bib.

 
Cut around the fleece template leaving a 1/4" allowance around all edges for sewing.

 
Sew the right side of your front fabric to the right side of your back of the bib fabric square, leaving the neck notch open for turning.  We'll close it up later.

 
It will now look like this.


Cut off the excess fabric all the way around to make the fabric ends even.  Also, make little notches all the way around about every inch to make the curves pretty when you turn it out.

 
Turn it right sides out.

 
Pin your bias tape to the bib neck.  You can do this the right way or you can do this the cheater way.
 
 
Sew the bias tape in place, making sure to fold your ends under as shown.


Trim your strings and you have an adorable bib for your little one!  If you used two different fabrics, it is also reversible.


Great job!  I hope you enjoyed this project as much as I did.  Post pics if you make some for your little one.


Tuesday, September 10, 2013

Monster Party Part 2: The Fun

Every party needs some fun activity for the party goers to participate in.  When I started planning this Monster party, I actually had a pretty easy time settling on an activity.  I am a LOVER of handprint crafts, so handprint monsters were at the top of my list.  Bonus??  I already have paint and paper on hand because of how much we craft anyway.  Add a handful of googley eyes left over from the party décor and a handful of sharpies...voila!  Instant craft!


When each child came in, we painted his/her hand according to how they wanted their monster to look, then stamped it onto a paper with their name in the corner.  We then washed their hands, and left the paper to dry as they moved on to other activities.


Later in the party, once the paper had dried, we had them come back to add googley eyes and marker faces to their monsters.

I recommend using fast drying paint, such as acrylic, over more watery paint, such as finger paint, if you are doing this in a party setting.  Otherwise, you will just end up with soggy papers by the time the party is over.

These made great little keepsakes for takeaways...and what kid doesn't love getting messy for a few minutes?


I also wanted something for the kids to be able to do in the down time....whether it be while other kids made their handprint monsters or while parents were making their plates.  I found these great little activity pads in the Walmart aisle with the finger paints and coloring books.  It had blank monsters with stickers to make the faces.  I tore out the pages individually and cut the face stickers all out into smaller pieces to scatter on the table, then tossed them into pails to set out like this.


The kids seemed to really enjoy this...and it was SO simple!

These activities were easy and very nearly free.  The activity book was around $3.  The other supplies I already had at the house from our daily crafting or leftover from party decorating and favors.

Love these?  Stay tuned the rest of the week for the invitations and decorations, the favors, and the party recap!

Tuesday, May 14, 2013

Dye Rice for Sensory Tubs and Projects

There are a million and one uses for brightly colored rice.  Mostly, I just wanted it for my kids to dig in for sensory bins.  I have seen other tutorials out there using rubbing alcohol to die the rice, but I really wanted to die the rice using something that if the kids happened to eat it....it would be a little safer than that.  After a while, I decided white vinegar should do the trick.  After all, it is used to die Easter eggs and it evaporates fairly quickly.

First things first...grab your supplies

1 c. uncooked white rice per color (we did 3; I use Zatarain's)
2 Tbsp white distilled vinegar per color
several drops food coloring each color

one small bowl per color
one sandwich sized bag per color
1 c. measure and 1 Tbsp measure
wax paper
shallow pans for drying

Ok!  Now that you have all of your supplies together, we can get started!

Measure 1 cup of rice into each sandwich baggie.  If Zatarain's rice is available in your area, I recommend using it over other brands.  It holds its form much better.


Set those aside until we finish mixing our colors.  In each small bowl, mix 2 Tbsp white vinegar with food coloring and stir well.  The color intensity will depend on how much food coloring you add, so if you like the colors bright, go a little crazy!  The color will be much lighter on the rice than in the bowl.  We used orange, lime green, and purple.


Now, dump one of these colors into each bag of rice.  You want to work these one at a time so that your rice doesn't get mushy.


Squeeze the air out of the bag, and seal it.  Then just squeeze and mash to your little heart's content until all of the rice is well coated in coloring.


Or you could get a little help like I did.


I think she was a little excited.

Once your rice is fully coated, dump it into a shallow pan lined with wax paper to dry.


Ours took about an hour and a half to dry completely.  Of course, I couldn't leave it alone...I kept going over and mushing on it every 20 minutes or so.


When you are done, you have brightly colored rice to make sensory bins or other projects with.  Trust me....you will see projects with this in the future.  I am LOVING this!


I mixed all of ours up for the project we'll be working on, but store yours however you are going to use it.

Let me know if you try this with your kids or use another method that you love.


Tuesday, April 30, 2013

Best Bath Toy Solution EVER!

My kids LOVE to play in the tub.  I, however, don't LOVE cleaning the toys or smelling the ooky mildew and stale water smell.  Welcome to Toddler Tuesday.  If you struggle with stinky, mildewed bath toys, you will love this.

Here's what you will need:

1 bath toy caddy (mine is from Target)
2 pool noodles in your choice of size and color (can be done with one if you only want one color)
One large, scary knife

I paid a little extra for my toy caddy ($15) just to get a really adorable one, but you can pick one up for really cheap (around $5).  The pool noodles are under $2 each.

Go ahead and install your bath toy caddy to the tub by suction cup or whatever method necessary.

Now, get your large, scary knife out and begin cutting the pool noodles into rings.


Once you have cut the amount and color of rings you want, go ahead and rinse them under the faucet and toss them into the toy caddy.


Now you have floating bath toys that do not mildew or hold stale water.  These are super quick and easy to clean up, and the kids LOVE them even more than I thought they would!

If you try this at your house, let me know how much your kids love it!


Tuesday, March 5, 2013

Read Across America Week: Seussical Celebration

I love love love Dr. Seuss.  As most of you know, Saturday was his birthday.  That means that last week was Read Across America week.  Children all across America celebrated Dr. Seuss' birthday at school.  Since we have been working toward a more preschool style routine at our house during the day, I figured my munchkins would love to get in on the festivities.  I had so much fun with all of this that I just had to share some of it with you.  I'll skip the hard learning parts and just share the Seussical parts!


I picked a different book for each day of the week.  Monday, we read Horton Hears a Who.  Tuesday, we read Go Dog Go (yes, technically by P.D. Eastman, but the boy loves dogs). Wednesday, we read The Lorax. Thursday we read The Foot Book. Friday we read One Fish Two Fish Red Fish Blue Fish....AND....The Cat in the Hat (of course).

Here are two of the projects we did.  There were others, but we were having so much fun, I forgot pictures!

We started out by drawing a hat outline on red construction paper.  Next, we cut stripes from white paper and glued them in place.  Once the stripes were in place, we cut out the hat shape.  We then attached the hat shapes to the fronts of our paper plate rings.  (before we started, I cut the center circles out of red party plates)  This project was easy and fun.  The boy didn't take his off ALL...DAY...LONG!


The pictures just don't do this cutie justice.  I absolutely adore hand print projects.  The hand prints just add such a personal touch and make things such a keepsake.  I plan to hand these out to the grandparents as we do more and more of them.  Anyway...this was just as simple as orange pieces of construction paper and yellow, white, and brown paint.  I painted his hands yellow and helped him stamp them onto the paper.  Then we used his index fingers to make the eyebrows.  After that, I helped him use round foam brushes to stamp on the white and brown making the eyes and nose.  I think I had as much fun with this as he did.  When we finished, I let him just stamp to his little heart's content on another sheet of paper.

There were so many other fun things we did.  Maybe one day I will post the rest of the projects and activities along with any others I come across. 

Happy reading, everyone!


Tuesday, January 15, 2013

Don't Eat Pete! Family Game Night


We have recently instituted a family game night.  We found that we were spending too much time just living in the same house and not enough time enjoying being a family.  So...on our very first family game night...this is what I chose!

The game is called Don't Eat Pete.  All you need to play is a sheet of paper and a bag of M&Ms (the size of the bag depends on how many people are playing, how long you want to play, and how many M&Ms you want to eat).  I picked up a medium size bag of Valentine theme ones at our local Fred's.  Of course if by chance, you aren't an M&M person, you could always use Skittles or other candies...just make sure that you choose something that can be eaten quickly without problem.

On the sheet of paper, you need to draw a large tic tac toe style grid taking up the whole paper and leaving nine squares.  Then place one M&M inside each square.  Have the first player leave the room while another player chooses one M&M to be Pete.  Now have the player return to the room.  Chant "go, *player's name*, go" while they begin eating as many M&Ms as they can before picking Pete.  When the player chooses Pete, everyone says "Don't eat Pete" and the player must stop.  Refill the board and move to the next player.  Continue until all M&Ms are gone or everyone has a sugar rush!

This was such a simple game to set up for and play, but we all had the absolute best time playing.  My husband was particularly awesome at not eating Pete and ended up eating the majority of the candy by himself....not that he minded that one bit.

After we finished playing Don't Eat Pete, we watched the kids play Just Dance 3 on the Wii until bedtime.  Our first family game night was a huge success and we are all looking forward to next week!  I hope you and your family enjoy this game as much as we did.

Wednesday, November 21, 2012

TP Tube Turkeys

These adorable little guys are a great, quick and easy way to add a little handmade charm to your Thanksgiving table.  You can even get the kids in on the action.

Here's what you need:
toilet paper tubes (enough for the number of children you have)
Construction paper or scrapbook paper in yellow, orange, and brown (or other desired colors)
Scissors
A pen
Sharpies to make the faces
Elmer's glue

Ok, so start out by tracing the hands of your little people or having them trace hands themselves if they are a little bit older. 

I have a little boy who is two and a little girl who is one, so I traced their hands for them....five points if you can accurately guess which is which....I know, right?


Go ahead and cut out the handprints or if they are old enough you can have them cut these out themselves.  I cut one handprint out of each color that I planned to use for the tail feathers.

Once you have all of the handprints cut out, arrange them in whatever order you want and fix them together with Elmer's glue.


Now you will affix the toilet paper tube to the front of the hands.  I will tell you....since our handprints were so tiny I chose to only use half of a tube per turkey, so you may want to decide whether to cut the tube in half or whether to leave it whole depending on the size of your handprints.  I also glued the part where the paper is glued to the tube down so that I didn't have to worry about any remaining pieces of toilet paper showing.


Now you are going to either let them draw their own faces with washable markers or draw faces on with Sharpies.  Since my little people are so little, I chose drawing the faces myself.  I just let them scribble their own little artwork while I did this.


Now just incorporate this into your table decor or put wherever you want to showcase your little one's "hand"-y-work. 


Did you do this with your munchkins?  Do you have another Thanksgiving TP craft to try?  Let me know about it.


Tuesday, October 30, 2012

Healthy Halloween Party Snack (Cutie-Lanterns)

Every year, the kids have a Halloween party at school....every year, my daughter brings home an obscene amount of candy before we even think about going trick or treating.    I kept thinking, there has to be a better way to do this.

I was unloading the groceries last night and set a bag of clementines down on the counter next to a little jack-o-lantern my daughter had drawn.....I couldn't believe that the answer had been that easy (and that affordable) all along.

I don't know about you, but around here we can get clementines (cuties) for super cheap this time of year in bags.


I grabbed my sharpie and quickly got to work drawing little jack-o-lantern faces on all of the clementines from the bag I had just bought.  I grabbed a second marker and let my little artist help out making funny faces for our little friends.  They turned out SO STINKING ADORABLE!


I am PUMPED to send these to school for my daughter's Halloween party this year.  Each kid is going to have their own little jack-o-lantern to enjoy and NOT go into a candy induced coma!

This has to be the one time I am so glad I didn't pick up the papers from the countertop!


Have you tried this?  What did you do for your kids for their Halloween activities?  Let me know.  I love you hear from ya!