Party favors are always my favorite part of a party to put together. I guess I love that other kids are going to get little surprises the day of the party as well as mine. I try to give a variety of different things as favors so that there is something for everyone. Here is what we settled on this year.
The first thing I did was pick up a handful of these small gift bags for 33 cents a piece. I punched out 1" circles from cardstock using my 1" punch. I can't tell you how many ways that punch has saved my life. After that, I just added a few details with a Sharpie to some and touches of black and red construction paper to others to make these little faces on the bags.
Now that I had my gift bags read to go, I started work on what would go inside. The first item I added was super simple. I found, on the aisle with the crayons and coloring books, bottles of scented bubbles with awesome little monster like silly faces already on them. They rang in at 97 cents a bottle, so I splurged a little.
The next item to head into the favor bags was a teeny little pot of play-doh. You can actually pick up party packs of fifteen mini tubs for around 5 dollars in the toy section of your local store.
Of course, I couldn't just toss in a plain old tub on play-doh....so I went right to work cutting strips of neon paper to fit around the sides of the tubs.
I used a glue stick to attach the strips of paper to the tubs.
Then I used a Sharpie marker and some googley eyes to make monster faces on the tubs before tossing them into the bag.
I always try to include some sort of edible element to the favor bags. You know...a little sugar shot to take home...so that all of the moms roll their eyes and the kids all love me. ;)
This year, I incorporated my food item and my monster theme in these little cuties.
The clear little containers came in packs of four with different all different colored lids. The containers were four for $1. I filled them full of M&Ms and used googley eyes to make them into little monsters.
As I was looking for ideas for monster parties, I found a ton of different posts where Ugly Dolls (yes, that is actually a thing) were given out as monster favors. I loved them, but was NOT about to spend the kind of money it would take to get each child their own plushy. After about ten minutes of pouting, I went up to the bonus room to see what extra supplies I had in storage that could be used to possibly make these little fellas. Just to prove to you how much of an insane crafter I am...I already had yards upon yards of fleece fabric and a large bag of stuffing in my sewing/crafting supplies. My husband gave me a huge eye roll when I marched back into the living room with everything I needed.
Keep scrolling for the full tutorial on these plushy little guys.
I have no idea how much these would have cost me had I purchased the fabric and stuffing when I started the project....but for me...these were free....my favorite price. If you are doing these at home, here is what you need:
Brightly colored fleece fabric
White fusible fleece (scrap or smallest amount you can get)
White thread
Black Thread
an Iron
a Sewing Machine
Needle
Thread (I used a rainbow multi, but I recommend getting the colors of the fleece)
Stuffing
Scissors
If you are not really handy with a sewing machine...THAT IS OK! These are VERY crudely made on purpose. The whole point is for them to be MONSTERS! Sew crooked, mess up, that is the fun in them.
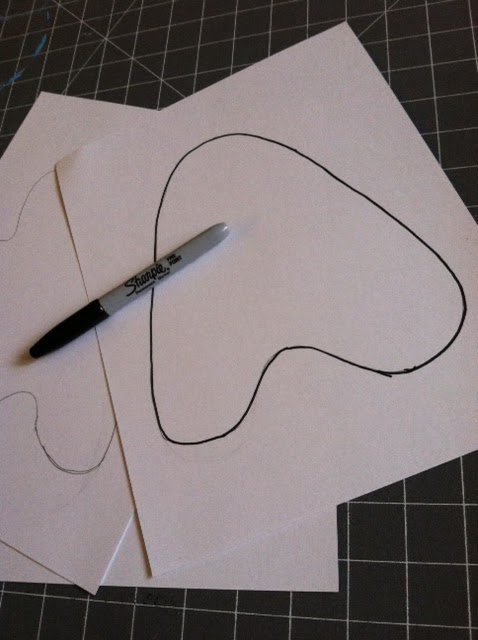
Start by making your monster templates. I just freehanded some little guys out. If you are not comfortable with that, there are books with monster templates in them. Cut out your templates from cardstock.
My templates ended up being around 7" tall.
The next step is to cut out squares from your fleece. You want to cut double the amount of plushies you want to end up with (fronts and backs). I cut my squares 10" so that I had plenty of wiggle room, but cut whatever amount you feel comfortable with.
Once you have cut all of your squares, you will want to trace and cut out your fronts. DO NOT cut out the backs. You will see why soon. This means, you want to trace shapes onto half of the fleece squares. I used a Sharpie (sheepish grin), but I would recommend using a fabric marker.
Then cut out all of your fronts with sharp sewing scissors.
Next, you want to cut out 1" circles for eyes and any accent pieces, such as teeth from your white fusible fleece. I used a 1" punch from cardstock as a template. Make sure you trace onto the stiff, fusible side, not the fabric face.
On these I REALLY recommend using a fabric marker rather than a Sharpie. You can see how it rubs off on skin. If you do use a Sharpie, make sure you cut all of the black part off completely. Otherwise it will show through when you iron this on and sew.
Place your eyes and teeth onto your faces where you want them and iron then on per the fusible fleece instructions.
Using your sewing machine with white thread, stitch around these pieces to secure them. It took me a few times to decide how I wanted to stitch these. I started out blanket stitching, but ended up using a short and wide zig zag to basically embroider them on.
Once you have sewn on all of your white pieces, you want to switch to black thread to add the pupils and mouths. Once again, I just used a short and wide zig zag to create an embroidery style stitch. Make the faces different in whatever ways you like. On some of my little fellas I even used one eye and made an "x" for the other.
Now you want to pin the faces face-down onto the squares you saved for the backs. When you stitch around fabric, it has a tendency to stretch or shift. If we had cut both back and front out, it would have been very difficult to keep the sides lined up perfectly. This way, you can move quickly and easily and just trim the extra when we are ready.
Stitch all the way around the edges, leaving an opening to turn these right side out. A normal straight stitch will do, but you can do these however you like. Once you have sewn all of these, you will trim the extra fabric off, turn them inside out, and stuff them.
You can see the little puckers here where I left the holes to turn them. Once you get all of your monsters stuffed, you will use needle and thread to hand stitch the holes up.
Then just toss them into a basket for a monster adoption station.
I also printed out little monster adoption certificates for the kids to name their monsters. I think My favorite monster name of the day was Hiffy.
The favors really ended up being super fun and cute. A huge hit for sure.
I hope you enjoy making these for the little monsters in your life!