Thursday, September 12, 2013

Monster Party Part 4: The Favors

Party favors are always my favorite part of a party to put together.  I guess I love that other kids are going to get little surprises the day of the party as well as mine.  I try to give a variety of different things as favors so that there is something for everyone.  Here is what we settled on this year.

The first thing I did was pick up a handful of these small gift bags for 33 cents a piece.  I punched out 1" circles from cardstock using my 1" punch.  I can't tell you how many ways that punch has saved my life.  After that, I just added a few details with a Sharpie to some and touches of black and red construction paper to others to make these little faces on the bags.


Now that I had my gift bags read to go, I started work on what would go inside.  The first item I added was super simple.  I found, on the aisle with the crayons and coloring books, bottles of scented bubbles with awesome little monster like silly faces already on them.  They rang in at 97 cents a bottle, so I splurged a little.


The next item to head into the favor bags was a teeny little pot of play-doh.  You can actually pick up party packs of fifteen mini tubs for around 5 dollars in the toy section of your local store.


Of course, I couldn't just toss in a plain old tub on play-doh....so I went right to work cutting strips of neon paper to fit around the sides of the tubs.

 
I used a glue stick to attach the strips of paper to the tubs.


Then I used a Sharpie marker and some googley eyes to make monster faces on the tubs before tossing them into the bag.
 
 
I always try to include some sort of edible element to the favor bags.  You know...a little sugar shot to take home...so that all of the moms roll their eyes and the kids all love me.  ;) 
 
This year, I incorporated my food item and my monster theme in these little cuties.
 
 
The clear little containers came in packs of four with different all different colored lids.  The containers were four for $1.  I filled them full of M&Ms and used googley eyes to make them into little monsters.
 
 
As I was looking for ideas for monster parties, I found a ton of different posts where Ugly Dolls (yes, that is actually a thing) were given out as monster favors.  I loved them, but was NOT about to spend the kind of money it would take to get each child their own plushy.  After about ten minutes of pouting, I went up to the bonus room to see what extra supplies I had in storage that could be used to possibly make these little fellas.  Just to prove to you how much of an insane crafter I am...I already had yards upon yards of fleece fabric and a large bag of stuffing in my sewing/crafting supplies.  My husband gave me a huge eye roll when I marched back into the living room with everything I needed.
 
 
Keep scrolling for the full tutorial on these plushy little guys.
 
I have no idea how much these would have cost me had I purchased the fabric and stuffing when I started the project....but for me...these were free....my favorite price.  If you are doing these at home, here is what you need:
 
Brightly colored fleece fabric
White fusible fleece (scrap or smallest amount you can get)
White thread
Black Thread
an Iron
a Sewing Machine
Needle
Thread (I used a rainbow multi, but I recommend getting the colors of the fleece)
Stuffing
Scissors
 
If you are not really handy with a sewing machine...THAT IS OK!  These are VERY crudely made on purpose.  The whole point is for them to be MONSTERS!  Sew crooked, mess up, that is the fun in them.
 
Start by making your monster templates.  I just freehanded some little guys out.  If you are not comfortable with that, there are books with monster templates in them.  Cut out your templates from cardstock.
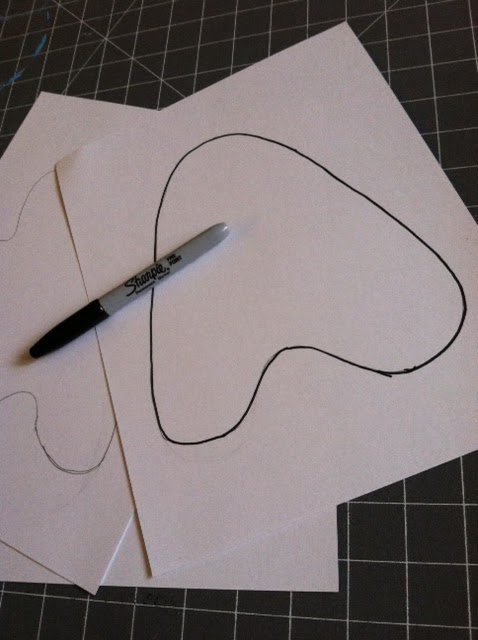


My templates ended up being around 7" tall.
 
The next step is to cut out squares from your fleece.  You want to cut double the amount of plushies you want to end up with (fronts and backs).  I cut my squares 10" so that I had plenty of wiggle room, but cut whatever amount you feel comfortable with. 


Once you have cut all of your squares, you will want to trace and cut out your fronts.  DO NOT cut out the backs.  You will see why soon.  This means, you want to trace shapes onto half of the fleece squares.  I used a Sharpie (sheepish grin), but I would recommend using a fabric marker.


Then cut out all of your fronts with sharp sewing scissors.
 
 
Next, you want to cut out 1" circles for eyes and any accent pieces, such as teeth from your white fusible fleece.  I used a 1" punch from cardstock as a template.  Make sure you trace onto the stiff, fusible side, not the fabric face.


On these I REALLY recommend using a fabric marker rather than a Sharpie.  You can see how it rubs off on skin.  If you do use a Sharpie, make sure you cut all of the black part off completely.  Otherwise it will show through when you iron this on and sew.
 
Place your eyes and teeth onto your faces where you want them and iron then on per the fusible fleece instructions.


Using your sewing machine with white thread, stitch around these pieces to secure them.  It took me a few times to decide how I wanted to stitch these.  I started out blanket stitching, but ended up using a short and wide zig zag to basically embroider them on.
 
 
Once you have sewn on all of your white pieces, you want to switch to black thread to add the pupils and mouths.  Once again, I just used a short and wide zig zag to create an embroidery style stitch.  Make the faces different in whatever ways you like.  On some of my little fellas I even used one eye and made an "x" for the other.
 
Now you want to pin the faces face-down onto the squares you saved for the backs.  When you stitch around fabric, it has a tendency to stretch or shift.  If we had cut both back and front out, it would have been very difficult to keep the sides lined up perfectly.  This way, you can move quickly and easily and just trim the extra when we are ready.


Stitch all the way around the edges, leaving an opening to turn these right side out.  A normal straight stitch will do, but you can do these however you like.  Once you have sewn all of these, you will trim the extra fabric off, turn them inside out, and stuff them.
 
 
You can see the little puckers here where I left the holes to turn them.  Once you get all of your monsters stuffed, you will use needle and thread to hand stitch the holes up.
 

Then just toss them into a basket for a monster adoption station.

I also printed out little monster adoption certificates for the kids to name their monsters.  I think My favorite monster name of the day was Hiffy.

The favors really ended up being super fun and cute.  A huge hit for sure.

I hope you enjoy making these for the little monsters in your life!


Wednesday, September 11, 2013

Monster Party Part 3: The Invitations and Decorations

The invitations for this monster party were the first place I started.  I only did a Facebook event, but it was still important to me for the invitations to be cute.  I used publisher to whip up these invites in a matter of no time.  The "monster" font I used was AR Darling, which came standard with the newest version of office.  The other font was Candara.  The monsters were free clipart from Google searching.  A few clicks of the mouse later, there ya have it.


I was really happy with the way these turned out....especially considering I whipped them up in under an hour for free.


I'm sure that if you have been following along, you caught a glimpse of my food cards on Monday.  These were thrown together from a template in Publisher and more of that fantastic free Google search clip art.  Just used the AR Darling font to type in the themed food names, and I had precious little food cards to use.  Simple as that.


The first bit of decorating I did was completely on a whim.  I used some neon paper that I had originally picked up for another project to convert my china hutch into MONSTERS!  Just added some touches of other paper to make faces, and taped these up inside the glass panes.  These are so adorable, I have seriously considered leaving them up permanently.


Of course, I couldn't leave those little dears to fend for themselves.  I grabbed a kettle bell and a picture that already sat on top of the hutch, converted them using some paper, and tossed them back on top.


Once that was complete, I threw some plain paper in frames with paper eyeballs and drew on some smiles for a few added monster touches.


On a recent shopping trip some vinyl monsters caught my eye.  I scored a pack of around 15 of these adorable little guys in the section with the crib bedding sets of all places.   I stuck these little guys up on several of our doors.  One even made his way into my kitchen window.


Other than those few touches, our decorating was pretty plain and simple.  Brightly colored table cloths, some confetti made from leftover neon paper, and a table runner of brightly colored scrapbook paper.  Cute, but extremely easy to throw together.


I hope you have been enjoying the Monster party so far.  Stay tuned for the favors and the party recap!  You won't be sorry!

Tuesday, September 10, 2013

Monster Party Part 2: The Fun

Every party needs some fun activity for the party goers to participate in.  When I started planning this Monster party, I actually had a pretty easy time settling on an activity.  I am a LOVER of handprint crafts, so handprint monsters were at the top of my list.  Bonus??  I already have paint and paper on hand because of how much we craft anyway.  Add a handful of googley eyes left over from the party décor and a handful of sharpies...voila!  Instant craft!


When each child came in, we painted his/her hand according to how they wanted their monster to look, then stamped it onto a paper with their name in the corner.  We then washed their hands, and left the paper to dry as they moved on to other activities.


Later in the party, once the paper had dried, we had them come back to add googley eyes and marker faces to their monsters.

I recommend using fast drying paint, such as acrylic, over more watery paint, such as finger paint, if you are doing this in a party setting.  Otherwise, you will just end up with soggy papers by the time the party is over.

These made great little keepsakes for takeaways...and what kid doesn't love getting messy for a few minutes?


I also wanted something for the kids to be able to do in the down time....whether it be while other kids made their handprint monsters or while parents were making their plates.  I found these great little activity pads in the Walmart aisle with the finger paints and coloring books.  It had blank monsters with stickers to make the faces.  I tore out the pages individually and cut the face stickers all out into smaller pieces to scatter on the table, then tossed them into pails to set out like this.


The kids seemed to really enjoy this...and it was SO simple!

These activities were easy and very nearly free.  The activity book was around $3.  The other supplies I already had at the house from our daily crafting or leftover from party decorating and favors.

Love these?  Stay tuned the rest of the week for the invitations and decorations, the favors, and the party recap!

Monday, September 9, 2013

Monster Party Part 1: The Food

Alright, folks!  It's birthday party time!  I decided this time around to break the party up into sections, then do a recap with linkups.  Since Mondays are Meal Plan Mondays, we'll start off with the food.

I debated and debated over a birthday party theme this year.  I picked a theme, fought to fall in love with the theme, decided I couldn't get on board with it, brainstormed, came up with a new theme, and the fun started!

MONSTERS!!!

What a perfect theme for my little critters!  My little monsters turn 2 & 3 this year, and this was a fun unisex theme that everyone could enjoy.

Every party (at least at my house) has to have themed food.  Here's what I settled on.

Monster Smiles
Monster Ears (with Earwax)
Monster Teeth
Monster Fingers (with Slime)
Monster Eyes & Noses
Monster Toes

..and of course, Monster Cupcakes!!

Smiles were croissant sandwiches.  We chose Ham, Turkey, and Cheese since it pleased most of our guests.  You could pick whatever fits your crowd the best.


Ears were Wavy Lays Original chips and earwax was just chip dip.


Teeth were Nacho Cheese Doritos.  What monster wouldn't have cheesy teeth?!?!


Monster Fingers were baby carrots and celery sticks.  The slime was, of course, ranch dip with food coloring.


The eyes and noses were strawberries, grapes, and pineapples.


The toes were pigs in pretzel dough blankets.


The Monster Juice was green Hawaiian Punch and Lemonade.  We also had sweet tea for the adults who weren't into drinking monster juice.


Last but not least, the cupcakes!  I baked key lime and orange dreamcicle cupcakes from mixes that were on sale to make the monster insides green and orange.  Then I got to work with brightly colored vanilla icing, a star tip, and a grass tip (borrowed from one of our favorite cousins). For the best results on the monster fur, I recommend starting from the outside edges and working your way in toward the center.  Once you get your desired fur texture, just top each cupcakes off with one, two, or three eyes to make your monsters complete.  These were so fun, and such a great addition to our party.

This was a pretty low maintenance menu.  I just whipped up some sandwiches, threw the pigs in the oven, sliced the strawberry tops, and was ready to go.  Everything else was just open and pour.  The most complicated thing on the whole menu was the cupcakes...and those were easy peasy as well.

I can't wait to show you the details for the rest of the party!  Stay tuned for the rest of the week!  Here's a small sneak peak of the dessert/favor table to show off the cupcakes a little more.


Enjoy!

Sunday, September 8, 2013

No Spend Month: The Challenge


As I write this, my family is preparing to start our very first no spend month.  For one entire month we will not purchase any extras whatsoever.  That means we will spend money only on bills, gas, and groceries.  In addition to cutting back to only those things, we are also going to do our best to cut down on the gas and groceries.  Time to send that poor piggy bank to the doctor!

The bills are obviously the bills.  We have tried over the last several months to streamline those as much as possible, but for the most part those will be the same as they are every month.  They are excluded from the budget that I am setting up for no spend month.

We live fairly far from civilization, so a large portion of the gas we burn is completely necessary.  Our plan to cut down on that is to carpool, combine trips, and not go on unnecessary trips.  We are both starting the month with full tanks as well.

Groceries are going to take the largest hit.  We are going to see just how little we can get by with.  Starting this adventure the week after a birthday party was a good idea since we will have party leftovers for at least the first two days of this challenge.  My plan is to use items already in our pantry and freezer as much as possible, plan and prepare meals that are inexpensive, and to really find and cut back on grocery items that are wants more than needs.  I can tell already that this is going to greatly effect my coffee habit.  Coffee will probably be my biggest sacrifice for the month.

Let's face it...you can't spend absolutely $0 for an entire month.  The idea of no spend is to spend $0 on extras and to live on only the necessities.

I have seen other families out there who burn only $200 for their entire no spend month.  Of course, those families are families of three.  We are a family of five and this is our very first no spend month, so we are setting our budget a bit higher.  Remember, this budget has to cover gas AND groceries for the ENTIRE month.  I'm not joking when I say that there are times we spend that in a week.  Our budget for our very first no spend month is......$350. 

My plan to stick to it is to go plastic free.  We will pull out cash to dole out as the month goes along, but the debit cards are getting locked away for the month.  Why?  I feel like using a debit card gives a false sense of security.  If you walk into a store with a debit card and go over budget, no problem.  If you walk into a store with cash and go over budget, you have to put something back.  My mother in law uses this genius envelope system that I may eventually have to try out.

I plan to post weekly updates as the month goes along to let you know how we are doing.  Deep breath...here we go!

Who's with us?!?!