I have spent way more time than necessary searching for exactly what I wanted. My problem is that when I have an idea sparked in my mind, I can't settle for anything other than the picture in my head. You know what that means....DIY time!
The best part about my DIY time is that you are going to benefit from it. Here are some of the projects I have been working on for this weekend's event along with some free printables for you to throw a Seussical shindig of your own. I PROMISE that I will take fifty million photos of the birthday party on Saturday to show you a complete party....this is just a sneak peak.
The Menu:
Green Eggs & Ham (green filled devilled eggs; ham and cheese sliders) recipes here!
Truffula Trunks (pretzel sticks)
Hop on Pop-Corn (popcorn, duh)
Cat's Hat Cabobs (strawberry and marshmallow kabobs)
Pink Ink Yink Drink (pink lemonade)
Fish in a Bowl (literally swedish fish...in a bowl)
Thing 1 & Thing 2 Cupcakes
Icecream...yeah, no awesome name for the icecream yet
A glimpse of the projects:
Make your own birthday banner by printing this out on cardstock (or photo paper if you want shiny like this), punching out the holes on the template with a hole punch, and stringing the penants onto the color of ribbon of your choice. I used a 3/8 inch red grossgrain ribbon.
Print out these and use a one inch circle punch (make sure it has the clear bottom so you can see what you are punching) to punch out the circles. You'll see pics when I post the entire party later, but I am going to use the top half of these to put on the wrapped "silverware" and the bottom half of these I will affix to the front of the cupcake wrappers.
(The ones pictured have "Silas and Leah," but the printables read "Happy Birthday.")
These are included in the printable file for the circles. If you missed that link you can find them all right here.
These will be applied to tootpicks and popcicle sticks to use as food signs.
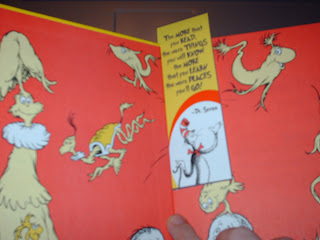
These bookmarks are from www.wanessacarolinacreations.blogspot.com and will be given inside Dr. Seuss books as favors.
Once I had all of that printed and cut out, it was time to move on to other projects. Love them or hate them...the tissue paper pompoms are here to stay...for the record...I love them. Round up some tissue paper in desired colors, an edge punch or very sharp scissors, and some floral or craft wire.
Accordian pleat the tissue, creasing each time. Mine are about 1"-1 1/2" wide pleats.
Snip the ends of the stack of pleats with either your scissors or edge punch. I used scissors because the Seussical theme allowed for a more whimsical, less structured edge. Edges can be round or pointed.
Tie floral or craft wire snuggly at the center of the pleated paper, then fan out each side like this.
Begin pulling one layer at a time up toward the center until you end up with something like this.
These can be made in any size with any shape edge. Continue making them until you have the amount you need. I made one large red, one large blue, one medium red, and one small blue for this party. Pictures of where I used these will be in the full party post.
I have a TON more to get finished before the weekend, and I absolutely can't wait to share it with you. Come back next week to see how the party turned out and get even more printables, tutorials, and more!
Did you miss out on the printables? Here are the links again.
More birthday projects to come:
Popcorn Cones and Stand
DIY Photo Backdrop with Props
Table Decor
Silverware Bundles with Circle Punches
Thing 1 & 2 Cupcakes with Circle Punches


i cant find ur printables can u help me if u have them still can u email them to me sentfrombelow23@gmail.com thank u
ReplyDelete