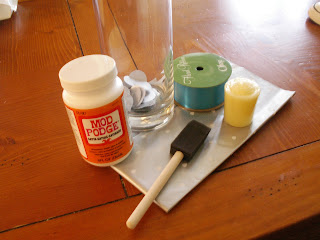
C'mon....you knew I was going to have to make one! I have seen several versions of these floating around online. This is my take on the project.
What you will need:
1 tall glass vase, preferrably with straight sides
1 pkg tissue paper, I used silver
1" punch tool
Modge Podge, I used satin finish
short length of ribbon
1 tea light, better to use flameless
Start by using your 1" punch tool to punch out a TON of tissue paper circles.
Make sure your vase is washed and dried thouroughly.
Start with your vase inverted and begin applying your circle punches flush to the bottom rim by painting on a thin layer of modge podge, pressing on a circle, then coating with another thin layer of modge podge.
Work all the way around the vase in a line, overlapping the circles slightly. Then begin another row, staggering the circles in a brick format.
Continue until you get close to the top rim of the vase, then flip the vase over to complete applying the circles.
Let sit to dry.
Once this step has dried, you may want to paint over one more thin coat of Modge Podge just to secure the project. Let that dry as well.
I chose to begin laying my circles out flush to the bottom of the vase rather than lapping them onto the bottom. You may do this or lap them onto the bottom if you choose not to use the ribbon. If you chose to use the ribbon like I did, you just need to wrap the ribbon around the bottom of the vase snuggly and secure in place with glue.
Now all you need to do is throw a candle into the vase!
Did you try this? Show me or tell me about it! I love to hear from you!


No comments:
Post a Comment